
All
Ai Content Generator
Ai Picture
Tell Your Story


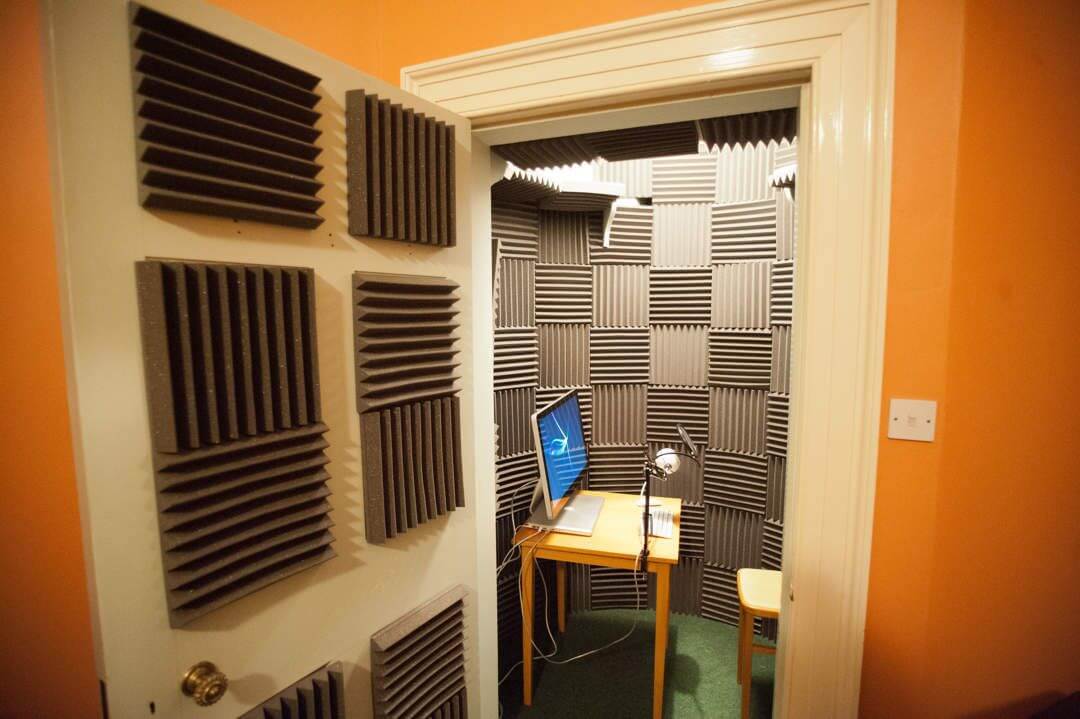
Soundproof Sanctuary: Building Your Own Recording Booth
Building a recording booth involves creating a space that minimizes external noise and provides good acoustics for recording audio. Here's a basic guide to help you build a recording booth:
Materials and Tools:
- Frame:
- 2x4 lumber for framing the structure.
- Screws and a power drill.
- Insulation:
- Acoustic insulation material (rock wool or fiberglass) for soundproofing.
- Acoustic sealant to seal gaps.
- Panels:
- Plywood or MDF for constructing walls.
- Acoustic foam panels for sound absorption.
- Door:
- Solid-core door for better sound isolation.
- Weatherstripping to seal gaps around the door.
- Ventilation:
- Ventilation fan for air circulation.
- Acoustic vents or baffles to maintain sound isolation.
- Flooring:
- Carpet or thick rugs for the floor.
- Ceiling:
- Acoustic tiles or panels for the ceiling.
- Windows:
- If you need a window, use double-pane glass for better sound isolation.
- Electrical:
- Electrical wiring for lighting and equipment.
- LED lights for illumination.
Steps:
- Design the Booth:
- Plan the dimensions and layout of your booth. Consider factors like space for equipment, acoustic treatment, and ventilation.
- Build the Frame:
- Use 2x4 lumber to create the frame for the walls. Ensure the structure is sturdy.
- Install Insulation:
- Fill the frame with acoustic insulation material to absorb and block sound. Seal gaps with acoustic sealant to prevent sound leakage.
- Construct Walls:
- Attach plywood or MDF panels to the frame to create the walls. Ensure a snug fit and seal gaps.
- Install Door:
- Use a solid-core door and weatherstripping to create an airtight seal. The door should fit tightly to prevent sound leakage.
- Ventilation:
- Install a ventilation fan to ensure proper air circulation. Use acoustic vents or baffles to maintain sound isolation.
- Flooring:
- Lay down carpet or thick rugs to absorb sound and reduce reflections.
- Ceiling Treatment:
- Install acoustic tiles or panels on the ceiling to control sound reflections.
- Acoustic Treatment:
- Apply acoustic foam panels strategically on the walls to absorb sound and minimize reflections.
- Electrical Wiring:
- Install electrical wiring for lighting and equipment. Use LED lights to avoid heat buildup.
- Test and Adjust:
- Test the booth by recording audio and adjusting the placement of acoustic panels as needed.
- Final Touches:
- Decorate the interior as desired, keeping in mind the acoustic properties of materials used.
Remember to consider the specific needs of your recording space, and adjust the materials and design accordingly. Professional advice or consultation with an acoustics expert may also be helpful for optimal results.
Related Posts
© 2025 Invastor. All Rights Reserved
User Comments