All

Crafting Nature: Creating a Stunning 3D Paper Tree
Creating a 3D paper tree can be a fun and creative craft project. Here's a simple guide to help you make a basic 3D paper tree:
Materials:
- Colored construction paper (green for the tree, brown for the trunk)
- Scissors
- Pencil
- Glue or double-sided tape
Instructions:
- Prepare the materials:
- Gather all the materials you need and make sure you have enough colored paper for the tree and trunk.
- Cut the tree shape:
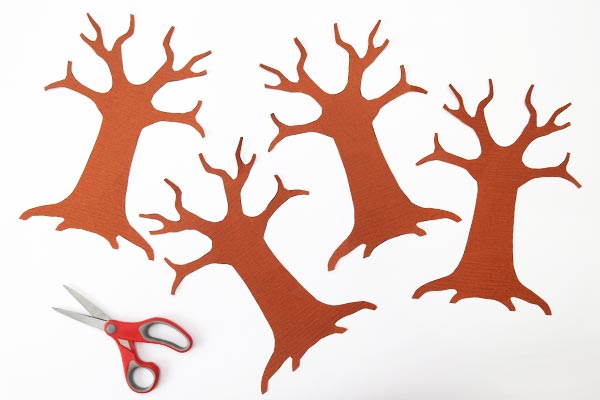
- Take a green construction paper and draw the outline of a simple tree on it. You can draw a basic tree shape with a trunk and branches. Make it as large or as small as you like, depending on your preference.
- Once you've drawn the tree shape, carefully cut it out using scissors.
- Cut the trunk:
- Take a brown construction paper and draw the trunk of the tree. The trunk can be a rectangle or a more complex shape, depending on your design.
- Cut out the trunk along the drawn lines.

- Fold the tree shape:
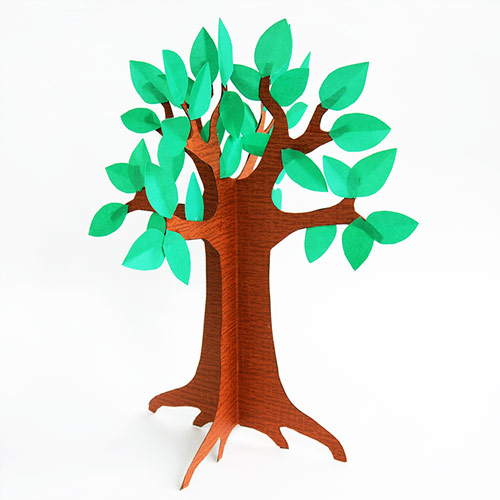
- To give the tree a 3D effect, fold it in half along the center of the trunk. Crease the fold well to create a clear separation between the front and back sides of the tree.
- Add branches:
- If your tree design doesn't have enough branches, you can cut additional branches from the leftover green paper and glue or tape them to the tree.
- Attach the trunk:
- Apply glue or double-sided tape to the back of the trunk, and then attach it to the bottom of the folded tree shape. Make sure the fold is at the top of the trunk, allowing the tree to stand.
- Optional: Decorate the tree:
- You can further enhance your 3D paper tree by adding decorations like small paper flowers, ornaments, or even tiny animals.

- Let it dry:
- Allow the glue to dry completely before handling or displaying your 3D paper tree.
Feel free to experiment with colors, sizes, and shapes to make your 3D paper tree unique and personalized. This craft is suitable for various occasions, including holidays, seasons, or as a general decoration.
Related Posts
© 2025 Invastor. All Rights Reserved

User Comments