
Ai Content Generator
Ai Picture
Tell Your Story

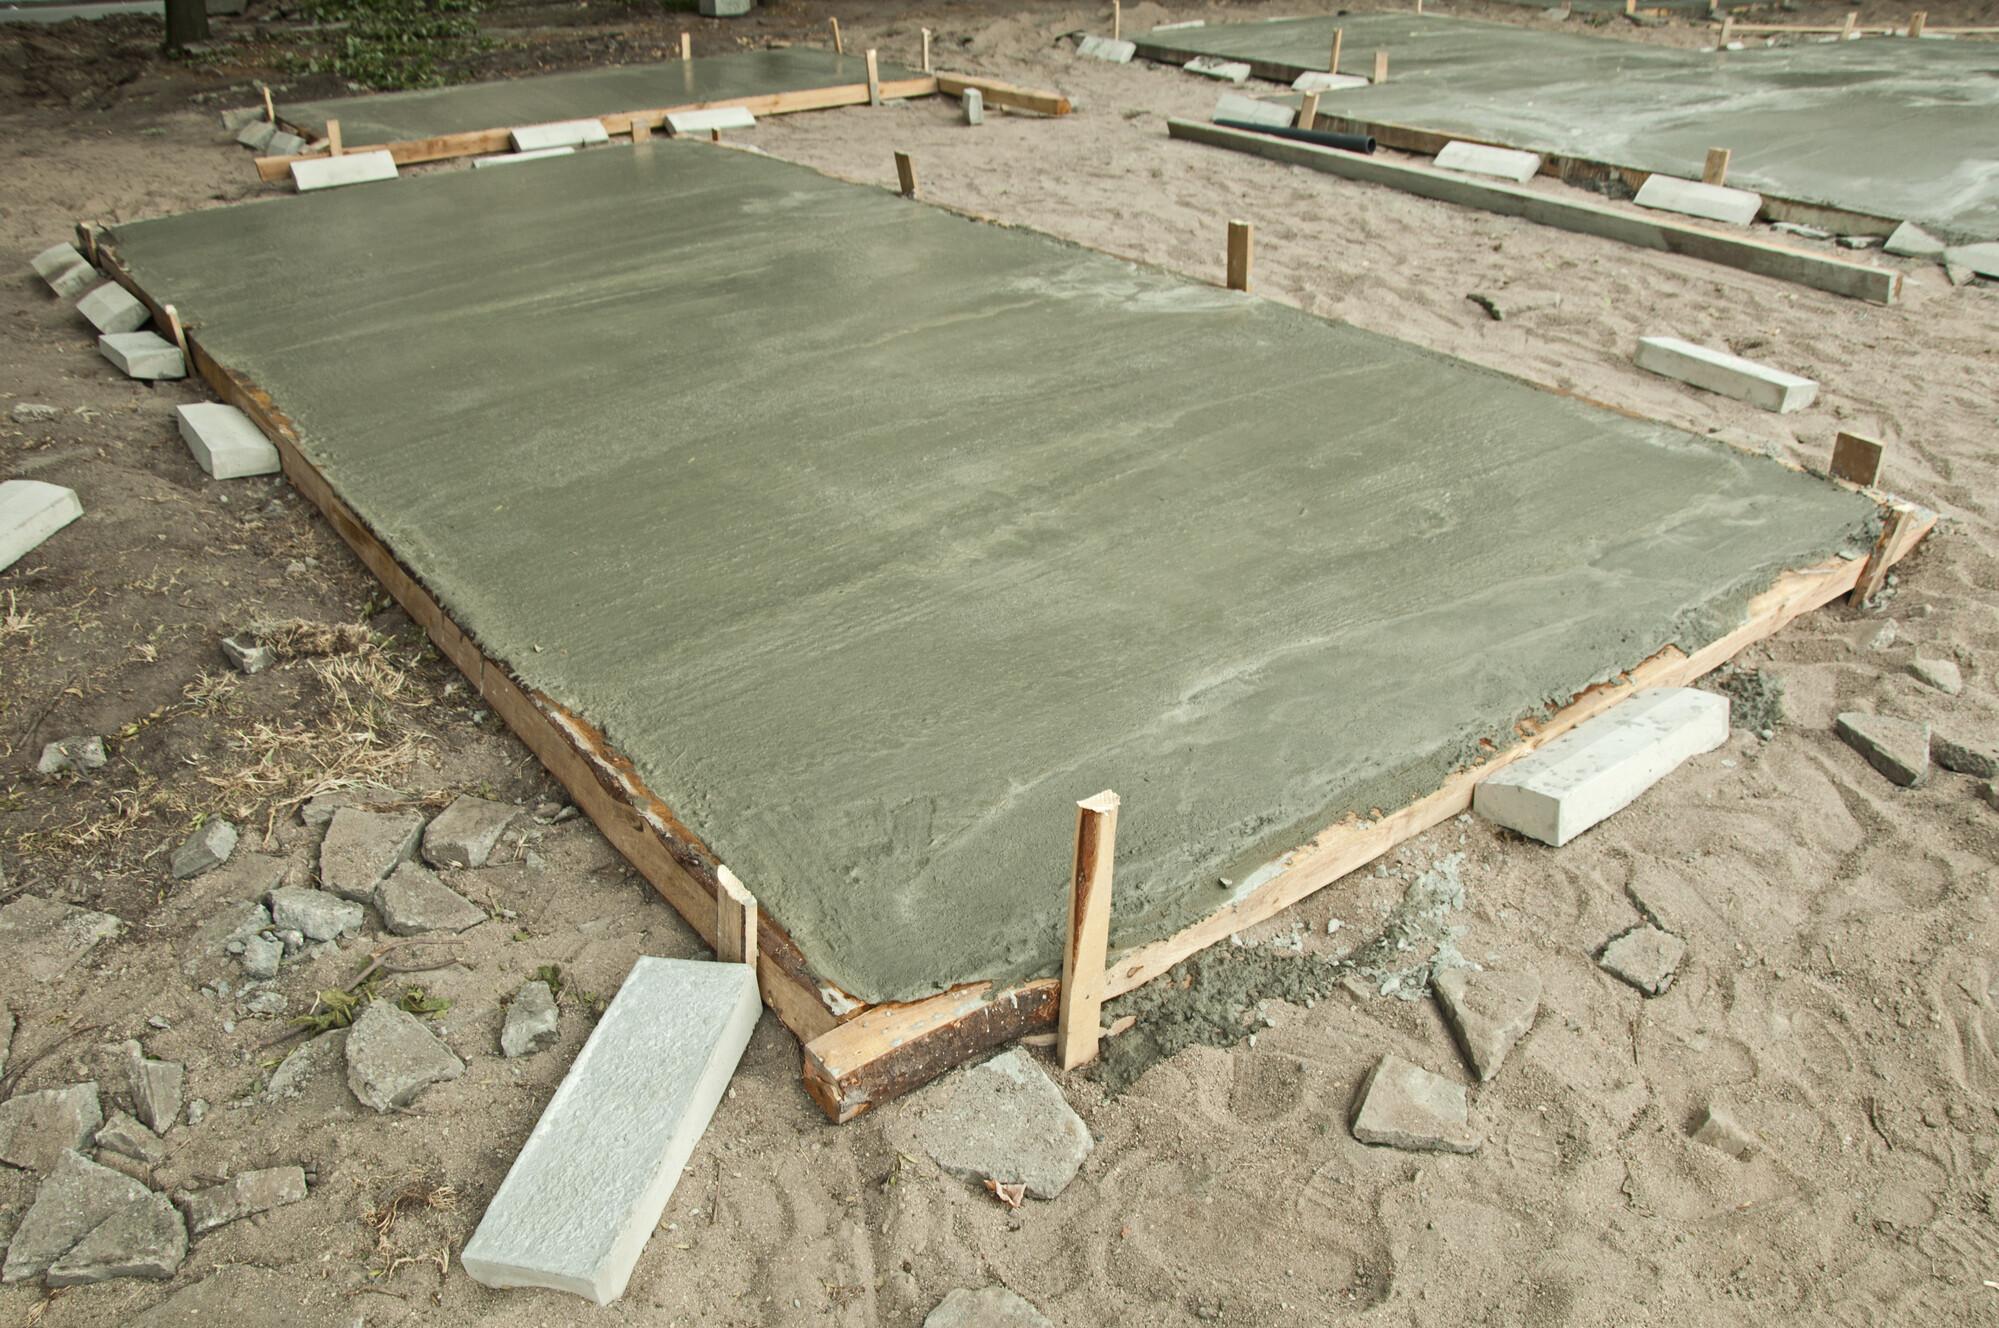
How to create a concrete slab
Creating a concrete slab is a common construction task that requires careful planning and execution. Below is a detailed step-by-step guide on how to create a concrete slab, along with examples and references for further information:
1. Planning and Preparation:
- Determine the purpose and size of the slab: Consider the intended use of the slab, such as a patio, driveway, or foundation. Measure the desired dimensions and mark the boundaries.
- Check local building codes: Consult local authorities or building codes to ensure compliance with regulations regarding thickness, reinforcement, and other requirements.
- Gather necessary materials and tools: You will need concrete mix, gravel or crushed stone, reinforcement materials (if required), wooden or metal forms, stakes, string, a level, a wheelbarrow, a shovel, a tamper, a screed board, a bull float, and a trowel.
2. Excavation and Site Preparation:
- Clear the area: Remove any vegetation, rocks, or debris from the site.
- Excavate the area: Dig the soil to the required depth, considering the thickness of the slab and any base material needed. Typically, a minimum of 4-6 inches of compacted gravel or crushed stone is recommended as a base for the slab.
- Compact the base: Use a tamper or a plate compactor to compact the base material thoroughly. This ensures a stable and level surface for the concrete.
3. Building Forms:
- Set up the forms: Use wooden or metal forms to create the boundaries of the slab. Ensure the forms are set to the correct dimensions and properly leveled.
- Secure the forms: Use stakes and string to secure the forms in place, ensuring they are straight and level. This will prevent the concrete from spreading beyond the desired area.
4. Reinforcement (if required):
- Determine if reinforcement is necessary: Depending on the size and purpose of the slab, reinforcement may be required. This can include steel rebar or wire mesh.
- Install reinforcement: If needed, place the reinforcement materials in the excavated area, ensuring they are properly positioned and adequately supported.
5. Mixing and Pouring Concrete:
- Mix the concrete: Follow the instructions on the concrete mix bag to prepare the correct ratio of water and concrete mix. Use a wheelbarrow or a concrete mixer to achieve a consistent and workable mixture.
- Pour the concrete: Start pouring the concrete into the forms, ensuring an even distribution. Use a shovel or a rake to spread the concrete and fill all corners and edges. Work quickly to avoid the concrete drying out before it is properly placed.
6. Leveling and Finishing:
- Screed the concrete: Use a screed board (a long, straight board) to level the concrete by dragging it across the top of the forms. Move the screed board back and forth in a sawing motion while maintaining contact with the forms. Fill any low spots with additional concrete and repeat the process until the entire surface is leveled.
- Float the concrete: Use a bull float (a large, flat tool) to smooth the surface of the concrete. This process helps remove imperfections and brings the cream (fine particles) to the surface.
- Edge the slab: Use an edging tool to create a beveled edge along the perimeter of the slab. This not only enhances the appearance but also helps prevent chipping or cracking.
- Trowel the surface: Once the concrete has hardened sufficiently, use a steel trowel to create a smooth and polished surface. This step can be repeated multiple times, using progressively finer trowels, for a more refined finish.
7. Curing and Maintenance:
- Curing: Proper curing is crucial for the strength and durability of the concrete. Cover the slab with a plastic sheet or use a curing compound to prevent rapid moisture loss. Follow the instructions provided by the concrete mix manufacturer for the recommended curing duration.
- Maintenance: Avoid heavy traffic or loads on the slab for at least a week. During this time, keep the slab moist to aid in the curing process. Afterward, regular maintenance, such as sealing or cleaning, may be required depending on the use and exposure of the slab.
References:
- Portland Cement Association: www.cement.org
- The Concrete Network: www.concretenetwork.com
- Quikrete Concrete Mix Guide: www.quikrete.com
Related Posts
© 2025 Invastor. All Rights Reserved
User Comments